“I want to make a version of this that I can wear and actually clean” I said to my husband Mike as I took off my Ent costume. It was my first oversized cosplay that I had done and I was already thinking about making improvements. Little did I know that a mere three years later I would start on making my newest Ent; the Entwife.
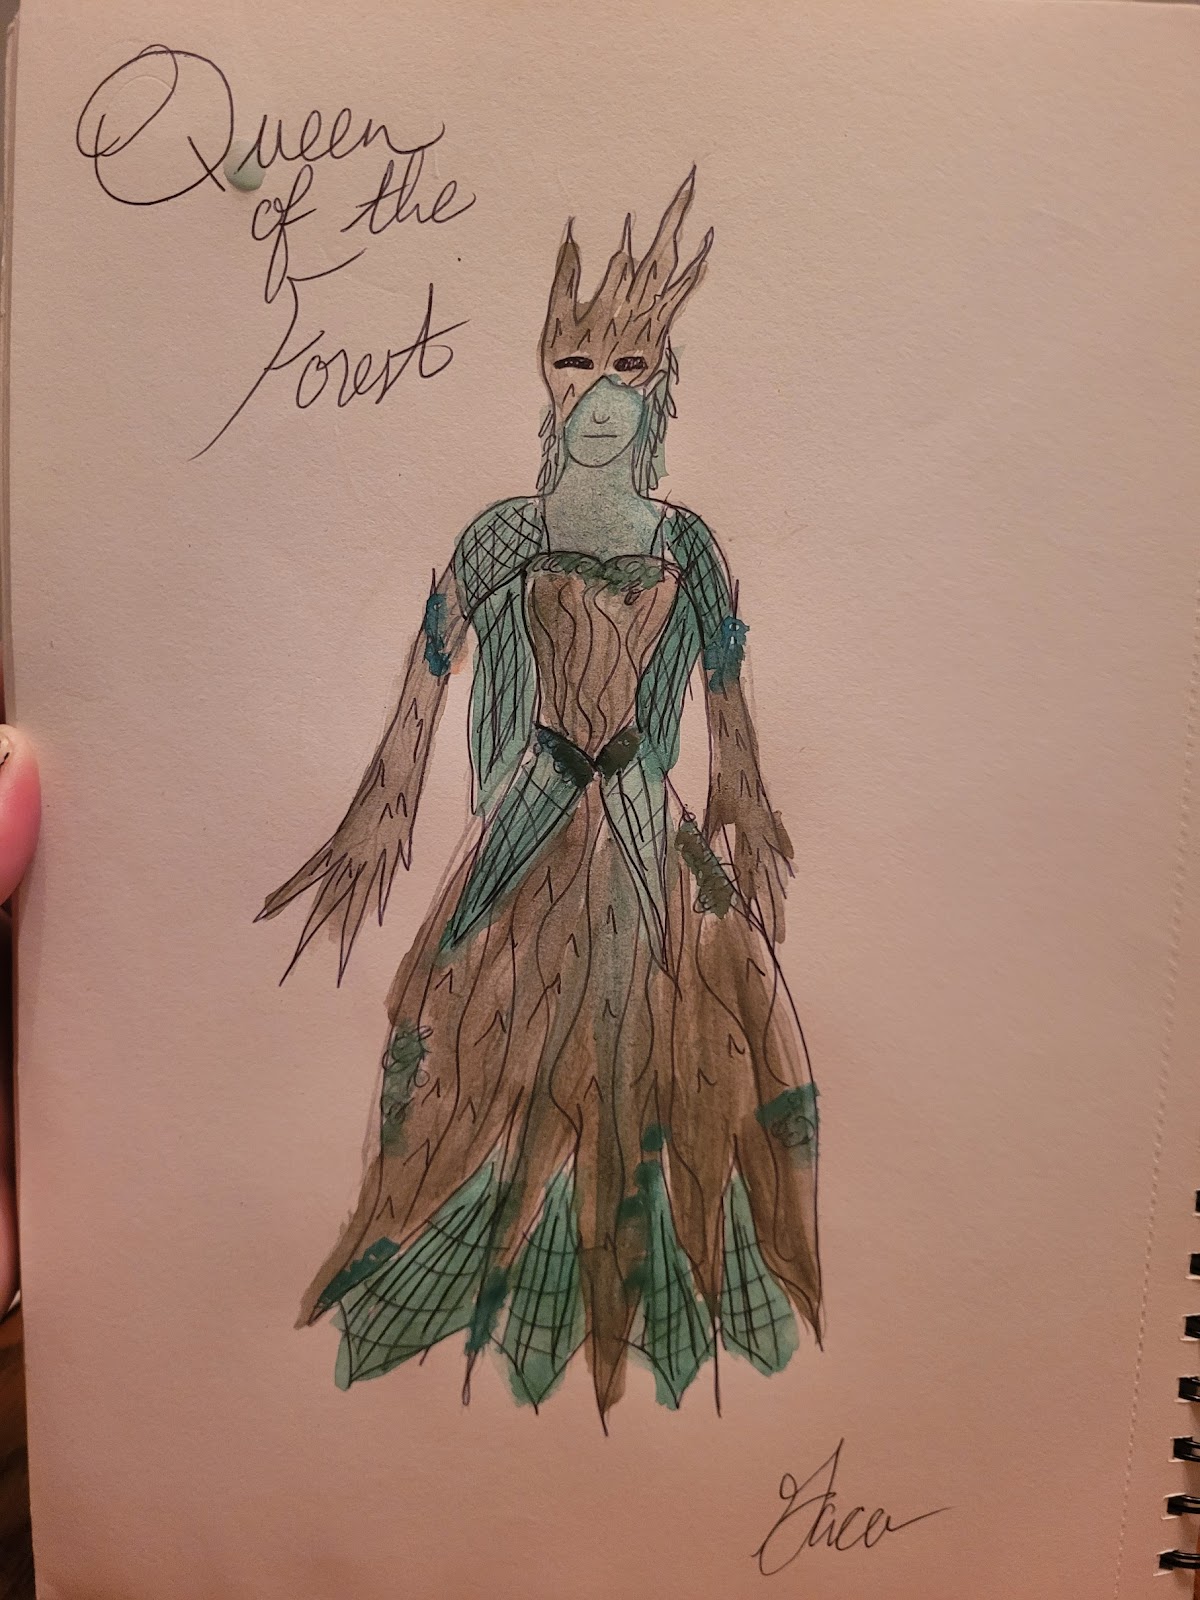
The Queen of the Forest (or The Entwife); designed by Gabrielle Arietta Cross Amey
The inspiration for the costume
I have always loved crafting and sewing; when I was very young I remember making a square dance dress for my grandmother (with my sister) out of paper and gift bows. Once I started to sew I wanted to keep doing it (my first official sewn outfit I remember making? An M&M vest with red rick-rack). The older I got the more sewing I did; my home economics class continued to foster this love and by the time I was in college I was borrowing my maternal grandmother's machine (the one I would eventually own and make all of my cosplays on) and making costumes. When I moved to Chicago after graduation it didn't take long for my machine to follow and then I found the world of cosplay. I always loved dressing up and making characters and now there was a hobby that was exclusively that? Sign me up.
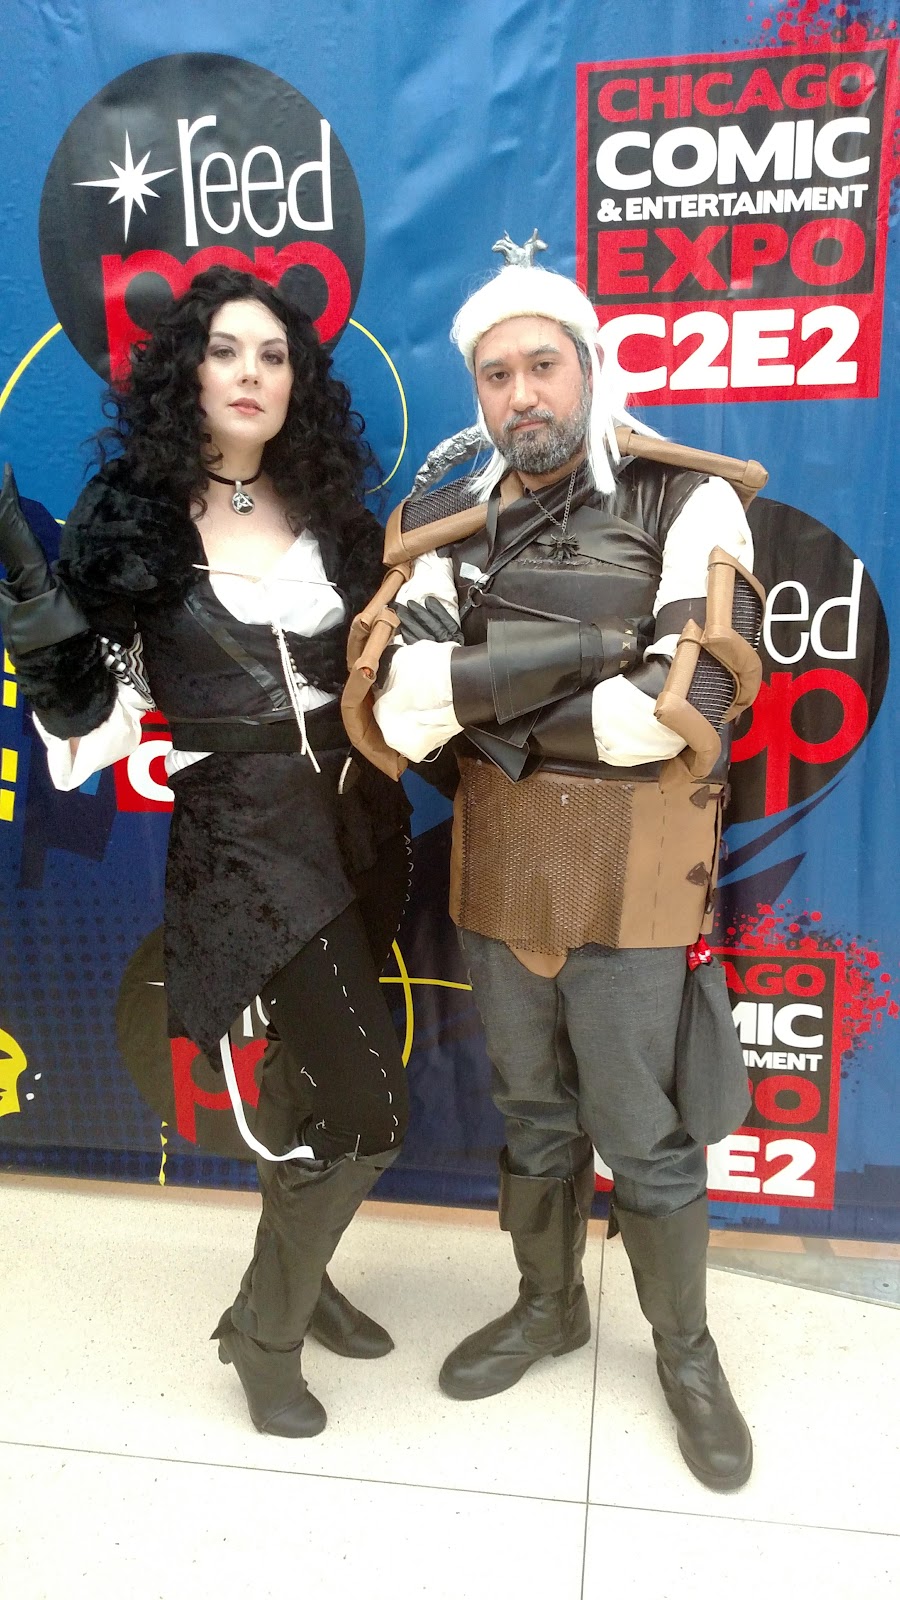
My First Official Cosplay build; Yennfer and Geralt from the Witcher; 2017
The Ent Wife is a character that I was always intrigued by; Treebeard is one of my favorite characters in The Lord of the Rings and I was intrigued by how the Ent Wives were just gone; as Treebeard said, they lost them. I had always been intrigued by how an Ent Wife look; I wanted her to look definitely feminine but still like a tree. It was an exciting and interesting challenge, especially since I was attempting to make this all out of fabric (my first Ent, Treebeard, was made all out of cardboard and while that was a fun build he didn't last very long..). I was excited to challenge myself and learn new skills and improve ones that I already had.
One of the skills I had to perfect was hand dying fabric; I decided to challenge myself and try to use mostly second hand materials. I had been lucky enough to stumble upon a large amount of quilting cotton at my local Goodwill for an amazingly good price (I still have fabric from this haul!). When I bought it, I bought it knowing that a good chunk of the fabric would be used for this cosplay; however it was not the color brown I wanted. Hence, dyeing. I dove head first into the project; I had only once previously dyed fabric before and the results were…fine but not perfect. This time the dyeing process went much smoother (the joys of using cotton!). Each dye job turned out a bit different because of the different base fabric that I was turning brown but I was actually very pleased with that because if you look at a tree, it isn't one uniform color of brown…it has variations. The different takes of the dye by the fabric combined with the different designs on the cotton added some dimension to the fabric. Once I was done dyeing the bark fabric I dyed a tablecloth that my aunt had bought and then donated to me…once the tablecloth was green it gave off the intended vibe of hanging moss. With the materials prepped I could begin.
The first thing that I had to do was make the base outfit that all of the details would be added too; I took some of the dyed fabric and made an 18th century inspired split skirt and a bodice that was taken from a pattern from the book Handmade Renaissance Faire Fashion by Maria Anton and Alassie Guisado; once I had the base pieces done I had to make sure that all of the edges were finished properly because I wanted to make sure this cosplay would last; the better finished it was the better it would handle washing etc. After cutting godets into the skirt and using parts of the tablecloth to fill in the gaps (essentially making the skirt look like it had “roots”) it was time to move on to the most intimidating part for me….the smocking.
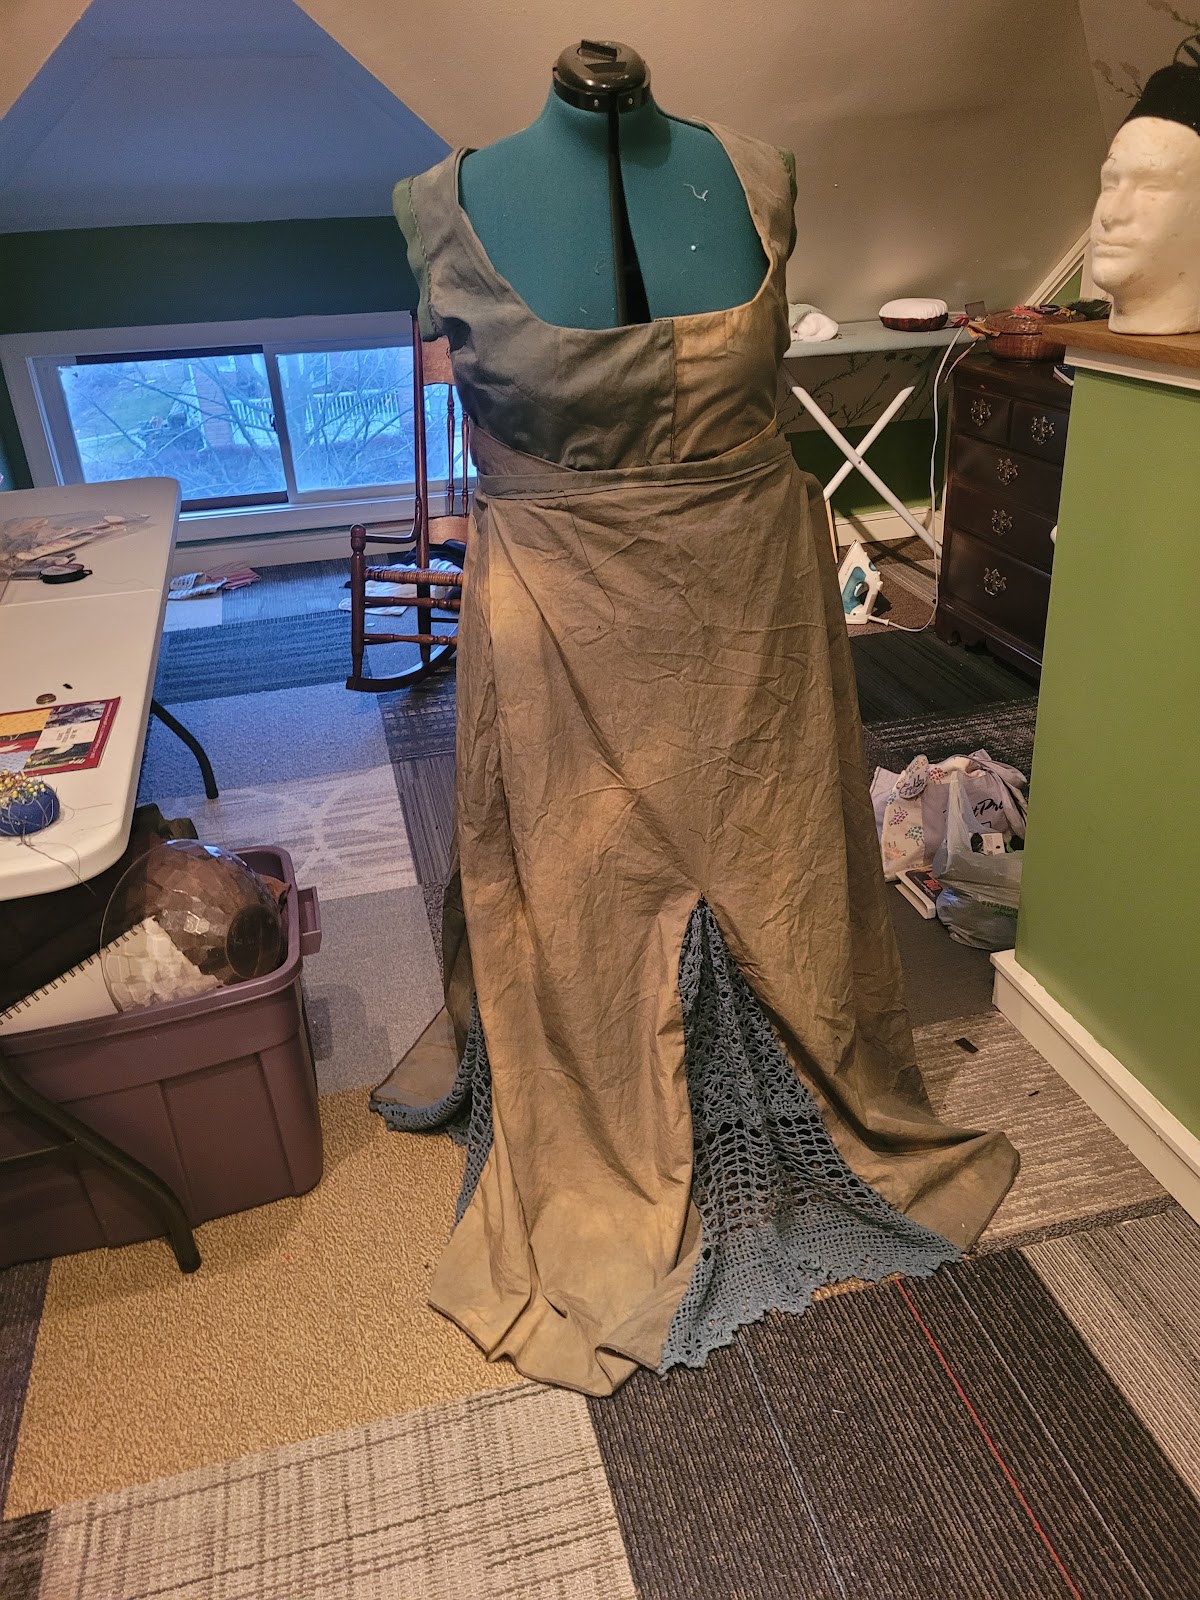
Base outfit before smocking added; 2025
Smocking is a type of fabric manipulation that involved careful stitching and math…I learned all of my techniques from the book Smocking Secrets by Maggie Hoffman (which I highly suggest if you want to get into this type of fabric manipulation…it is a great resource). The smocking technique I used is known as “The Braid” and while it is the look I wanted I did have to play around with how my smocking was going to be graphed and executed. In smocking, you usually want a consistent grid so that the pattern is consistent throughout the whole piece, but when trying to mimic something organic,having things too perfect can make it look incorrect. When I was studying the tree in our yard (a Japanese Weeping Maple which was the inspiration for my Ent Wife) I noticed that the bark pattern is not consistent…you can't just copy and paste a pattern and make it look like bark. With this in mind I started to loosen my pattern and let the braid become more organic…no piece was exactly the same and that was what I wanted. After each piece was done being smocked, pinned it to the base outfit and moved around until it felt “right”. Once each piece was placed on the skirt and bodice the hand sewing began.
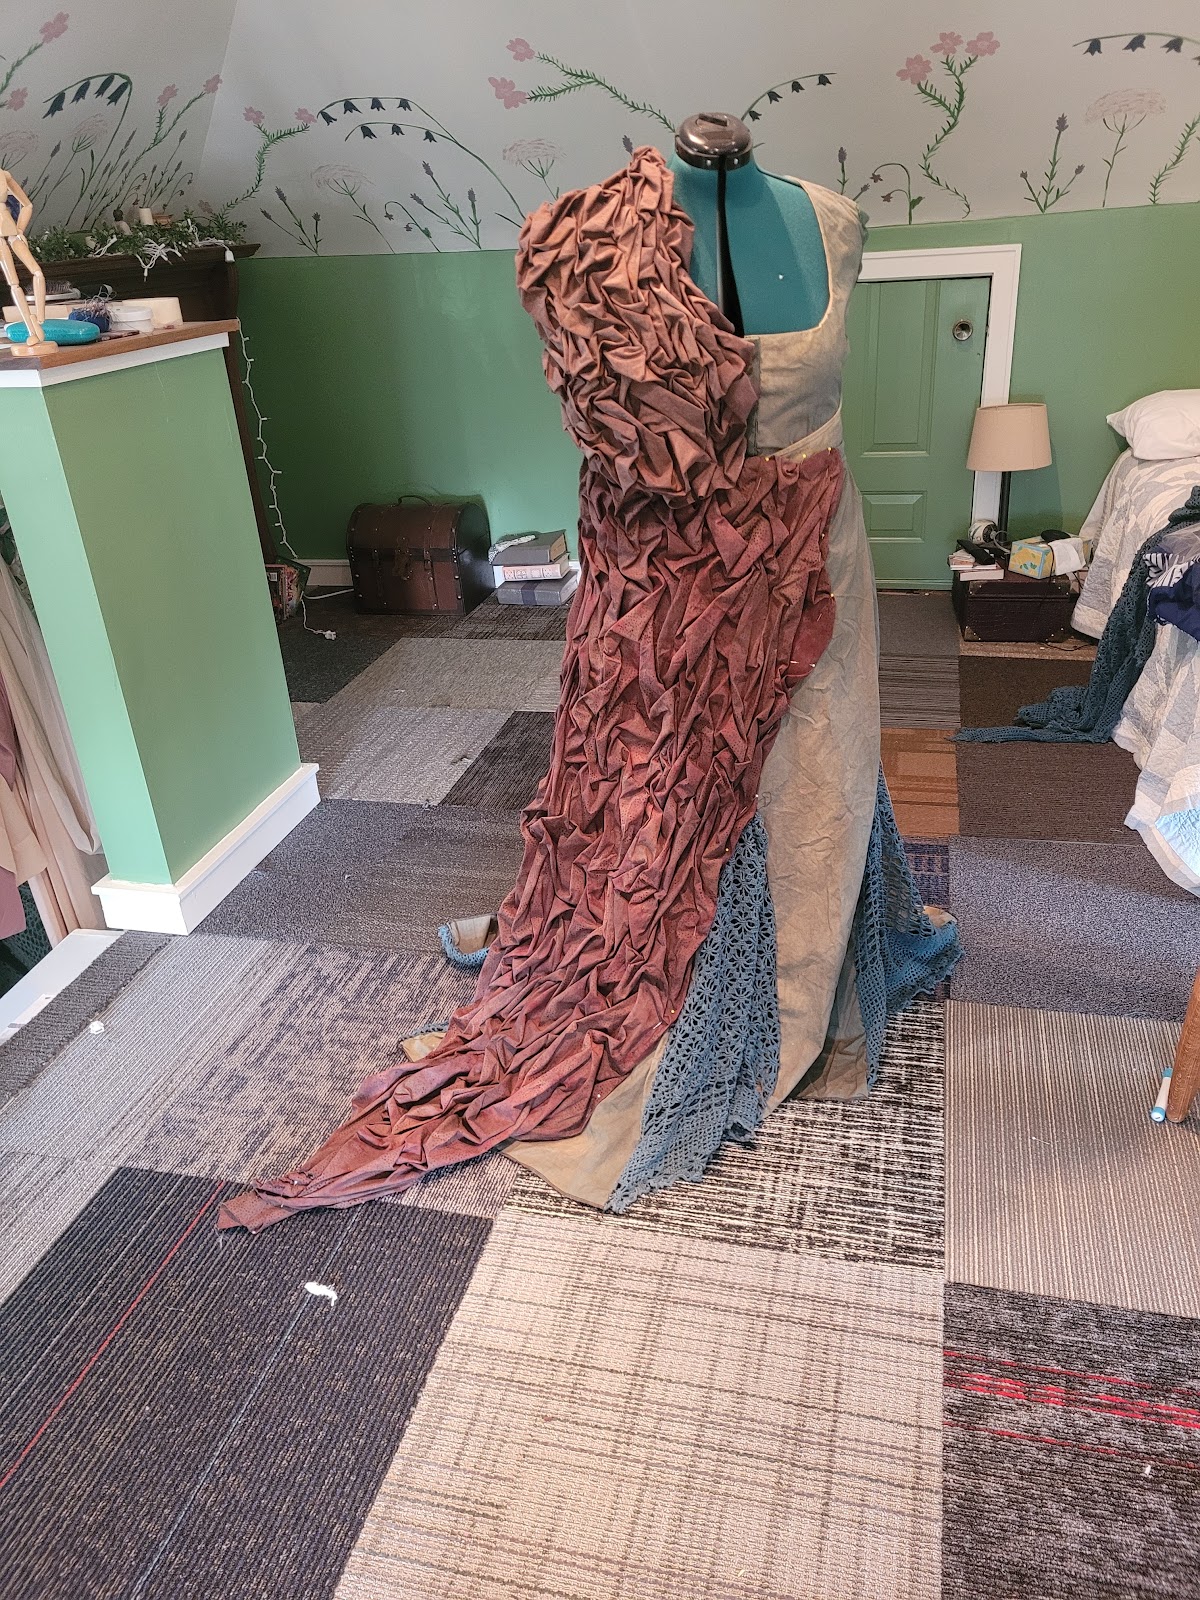
This cosplay was a practice in patience; the smocked pieces couldn't be machine stitched on because of the puzzle piecing I did to get the effect I wanted! After what felt like ages I was done with attaching the smocking and it was looking how I wanted! That is the hard part of original design; the idea in your head can be difficult to translate. But I was happy with where it was going.
The other piece that took quite a bit of time and had me use skills that I haven’t used in a while was my wig. The base of my wig is a crocheted hat which may not seem that big of a deal but the only thing I can consistently crochet with comfort are “scarves” (I say “scarves” because they are not always even or even consistent!) The wig is where I actually had to buy more materials that weren't second hand; I needed a thicker yarn to give the effect of willow boughs. Luckily I found a wool like yarn on sale after Christmas that worked perfectly. After I got the boughs on my wig base (some were reinforced with zip ties to give more height and rigidity) I had to start working on the leaves. Each leaf was cut out by hand using more of that hand dyed fabric and reinforced with gold duct tape (another after Christmas sale purchase). The reason I chose gold was because in The Lord of the Rings the Mellorn trees in Lothorien are golden in color…hence the nickname of The Golden Wood. If the entwives could go anywhere, why wouldn't they go and tend the trees that sparkle like Valinor? To add more dimension I added some clear beads to each leaf to mimic dew on a tree and add a little sparkle (because who doesn't want a little sparkle?).
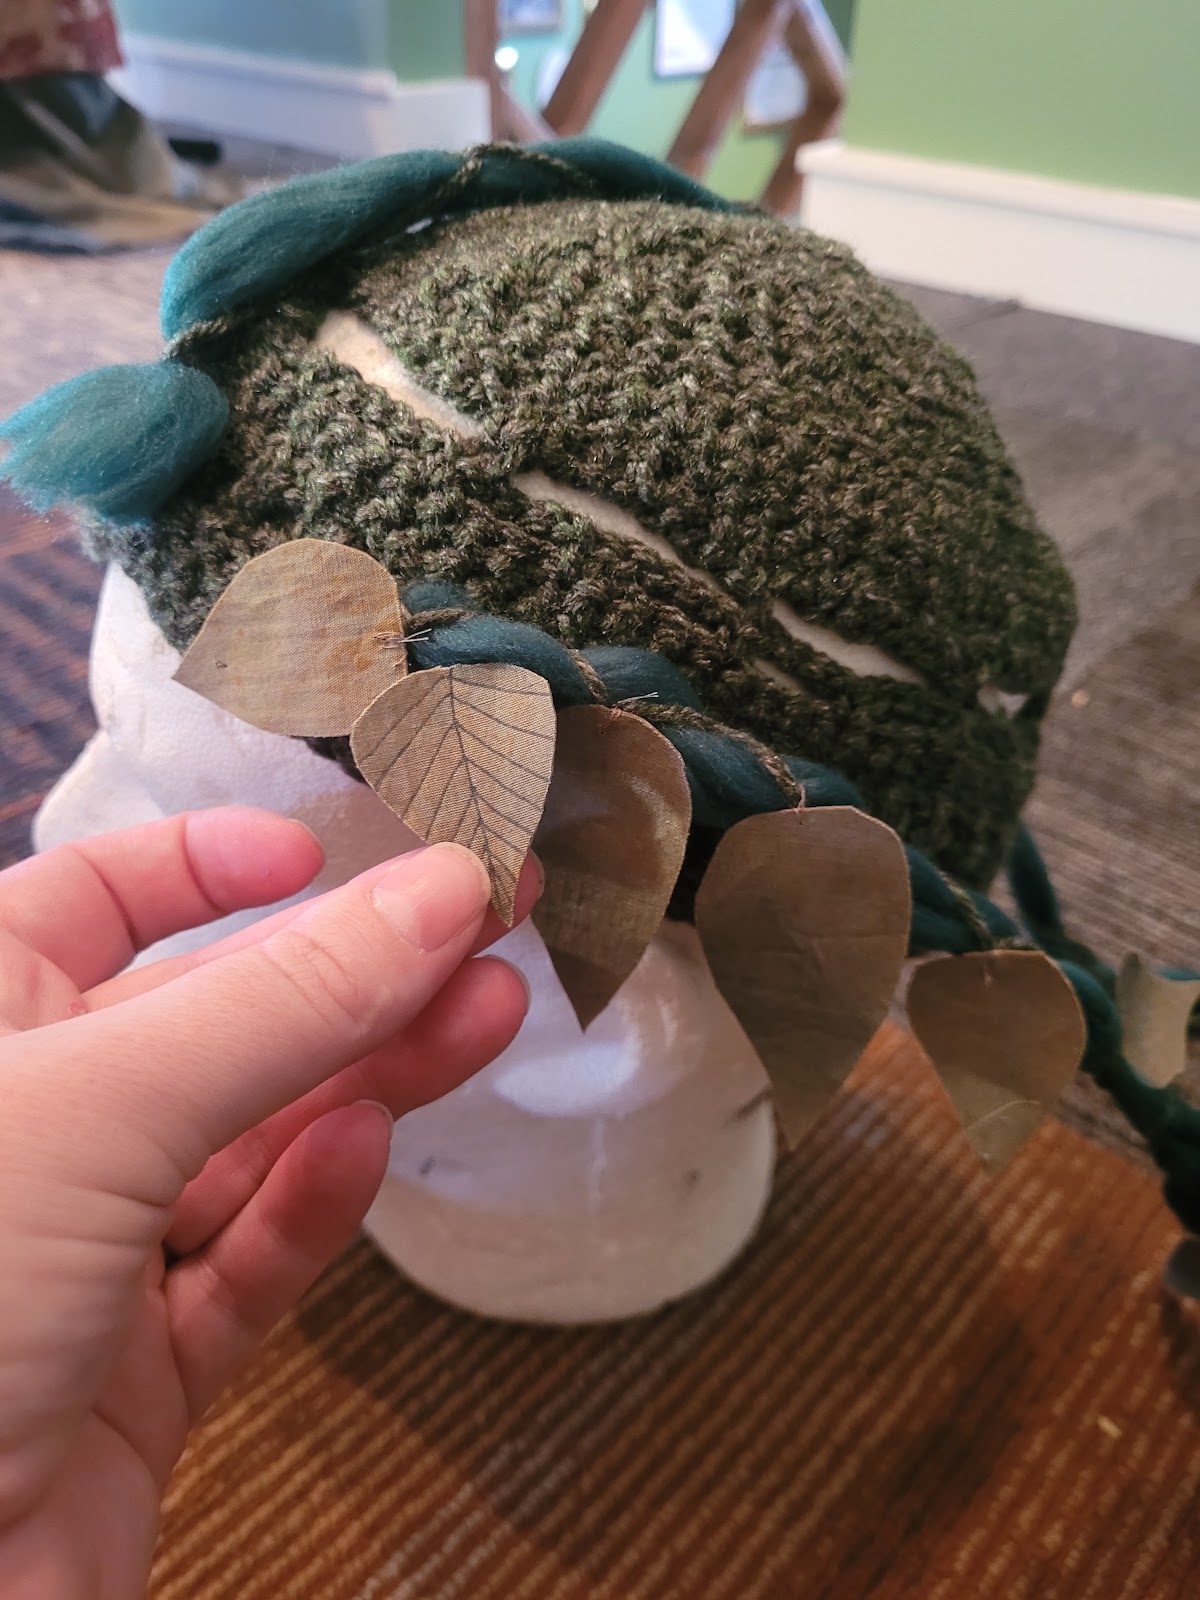
Start of the wig; 2025
The thing that you have to remember with cosplay and designing in general is that you can change things to fit your comfort level. I remember having spent hours smocking and crocheting tree bark like hands and arm gauntlets and then the first time I put it on all together I realized I just hated it. But I just moved with it and then I ended up with a design I liked much more; the moss “bell” sleeve was created out of necessity and is now one of my favorite pieces of the cosplay. Because of my initial trial and realizations I also came to the realization that I needed a solution to body paint because that became to messy and took too long to complete correctly; therefore I made my own stretch mesh shirt that I dyed to match the cosplay so that I could wear it more comfortably…and I am so happy with that choice.

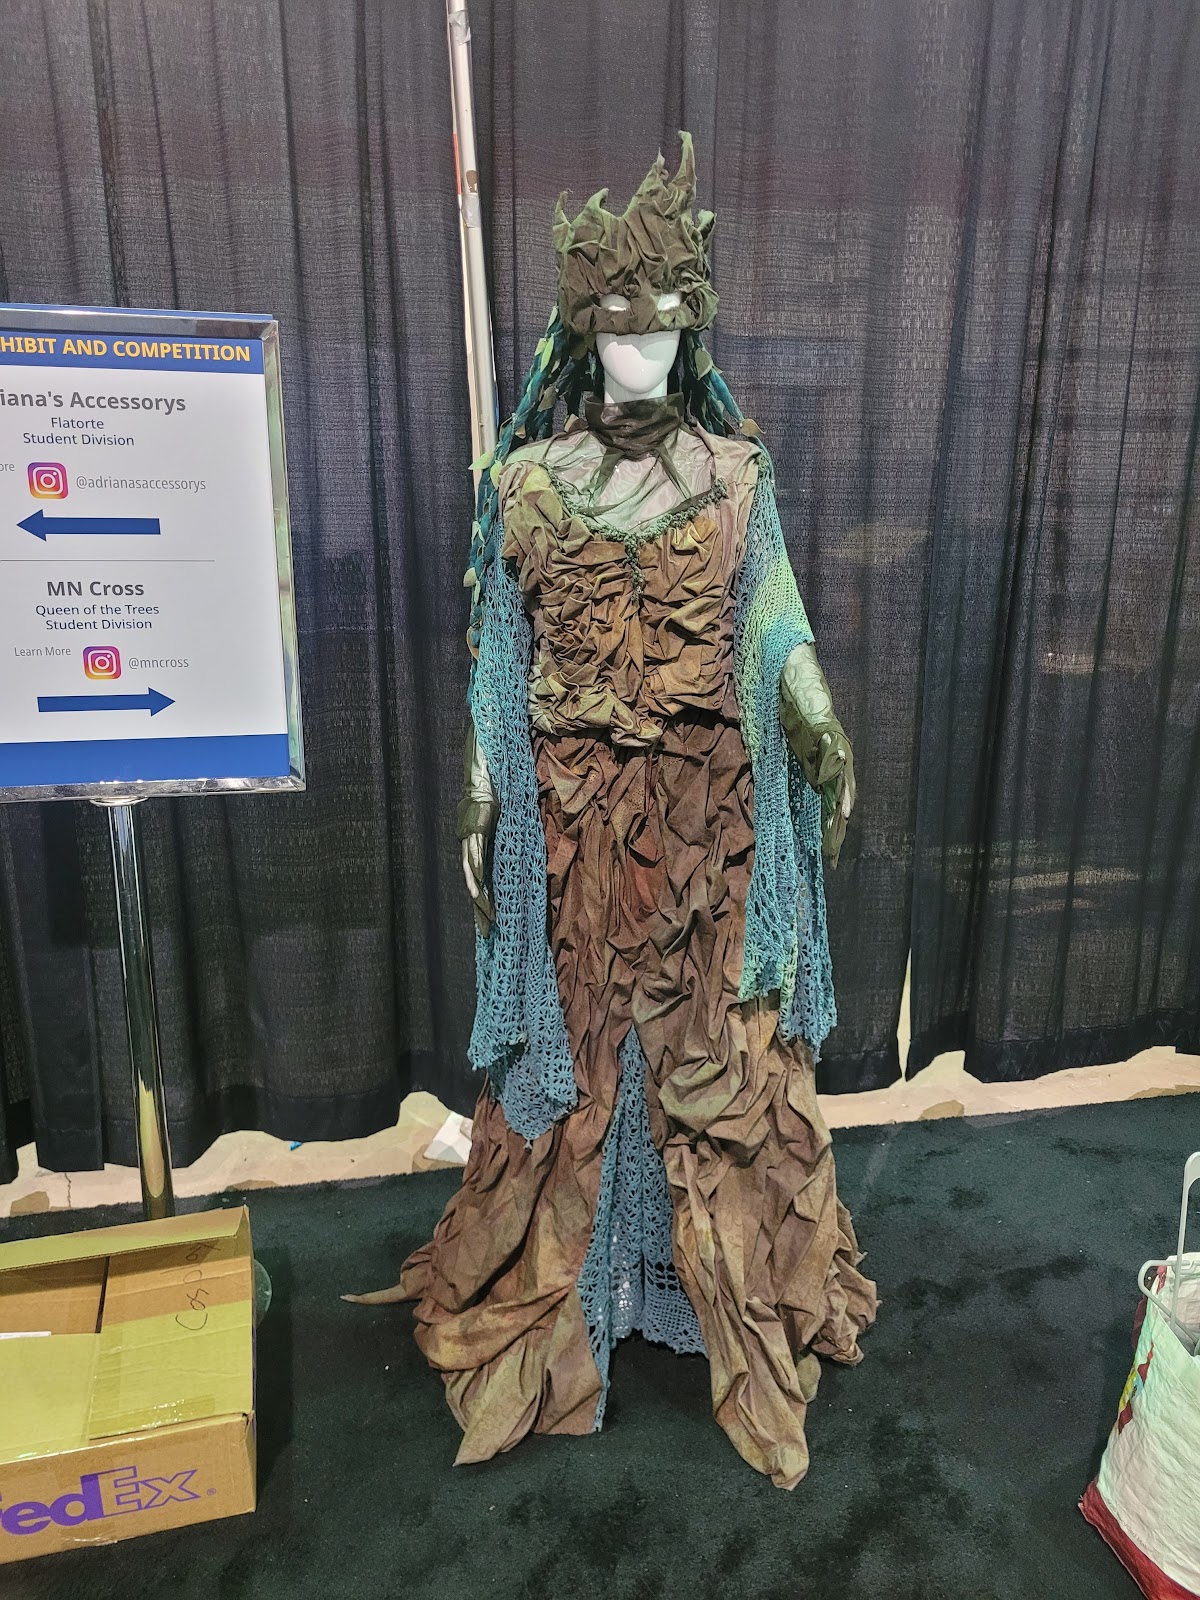
Version 1 of the Entwife at C2E2; 2025
The last thing I needed to work on was…how do I make my face look tree-like? By this time I was feeling fairly confident in my smocking skills so I decided to make a fabric mask; smocked material, old interfacing from another project, and leftover dyed fabric and we had our mask. The challenge was making it 3-D instead of looking like I just glued a piece of fabric to my face. It ended up being a bit of improv; a few stitches there, a tuck there, a magnet or two and we had a mask.
Wearing the Entwife is sort of magical because it is something wholly original to me but also completely niche so those who know are so excited to see it. My goal is for the Entwife to go on many marches and like a tree I feel like she will keep evolving and growing. All I can do is grow with her and hope that everything I add only aids her growth and doesn't stunt it.
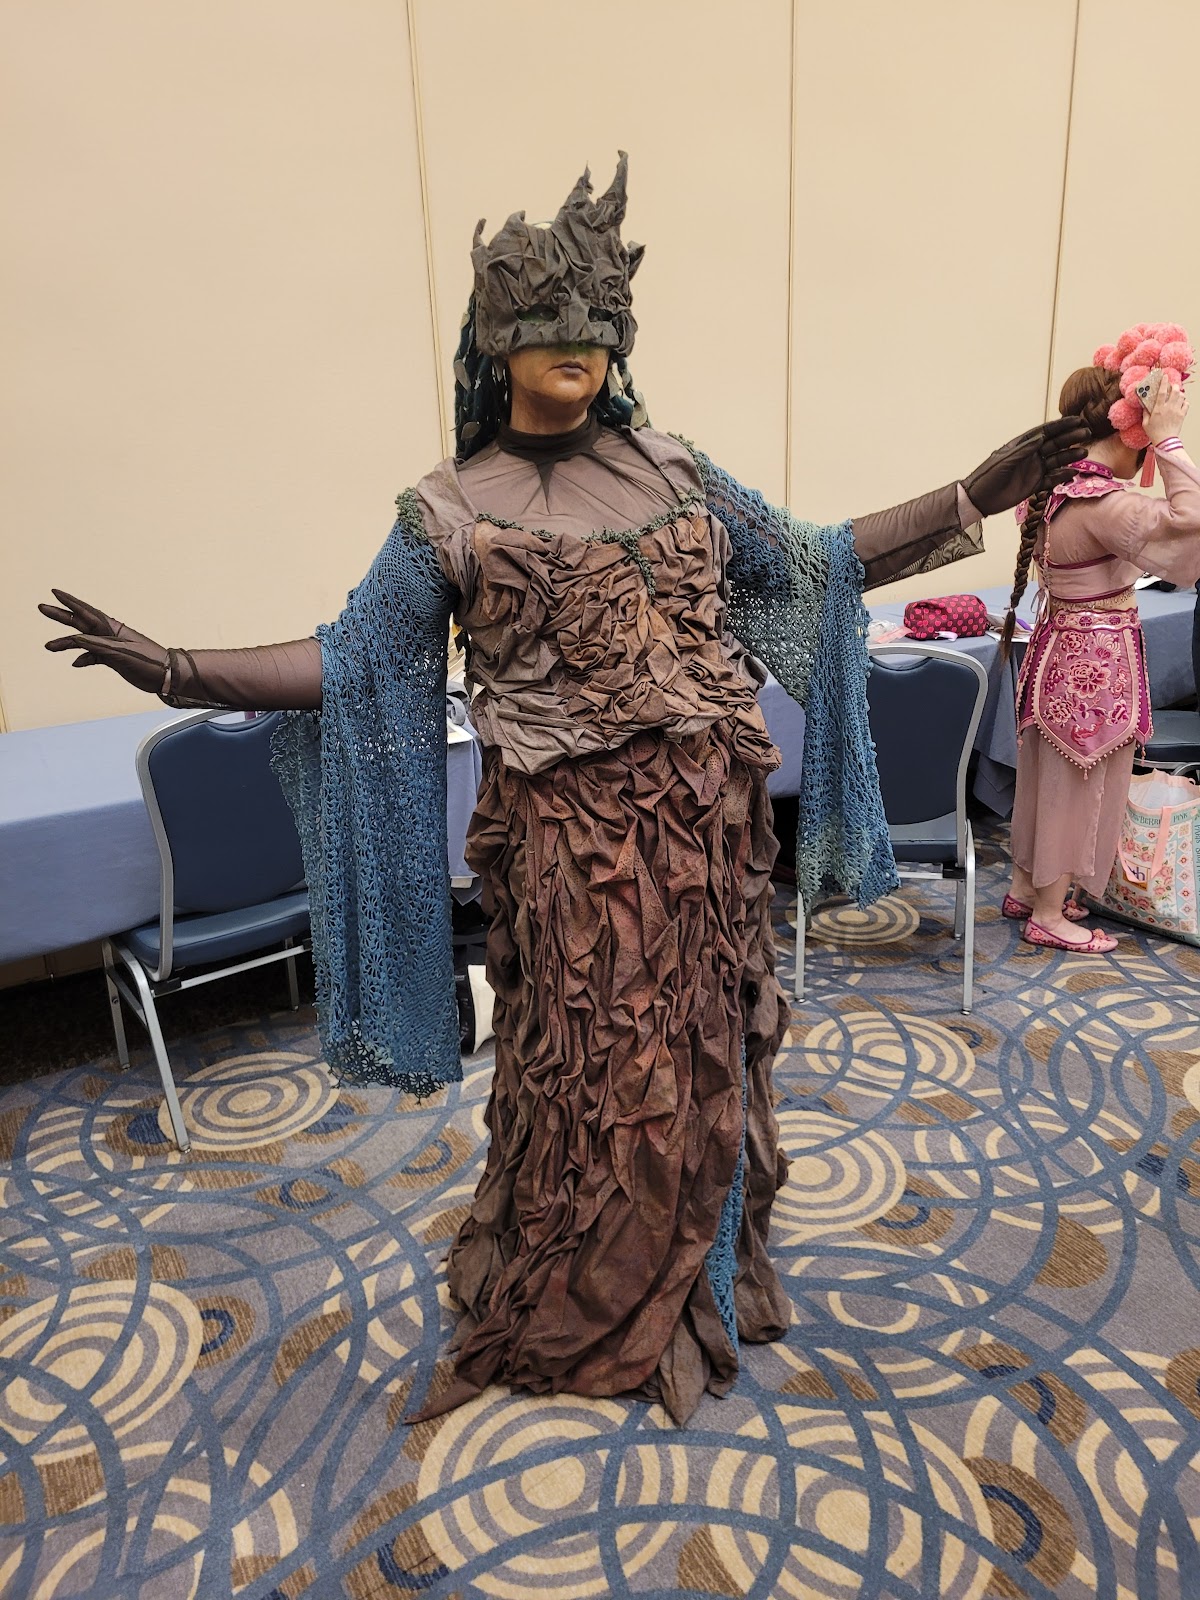
Entwife 2.0 at HH Americas; May 2025
What did this all cost?
Because most of these were second hand my costs are an estimate-
Fabric- Second Hand from Goodwill- approximately $60
Dye- 2 bottles from Goodwill- $4; 3 new bottles- $7 a piece ($25 total approximately)
Thread (HomeDec and Invisafil by Wonderfil Thread)- $13.50 for both
Snaps- From stash
Bias Tape- From a Goodwill grab bag- $2
Tablecloth- From Stash
Duct Tape- $3 per roll
‘Wool’ yarn- $2 a roll
Beads- From Stash
Total Cost (minus labor)- $110.50
Hours spend on this cosplay- Approximately 122 hours of work
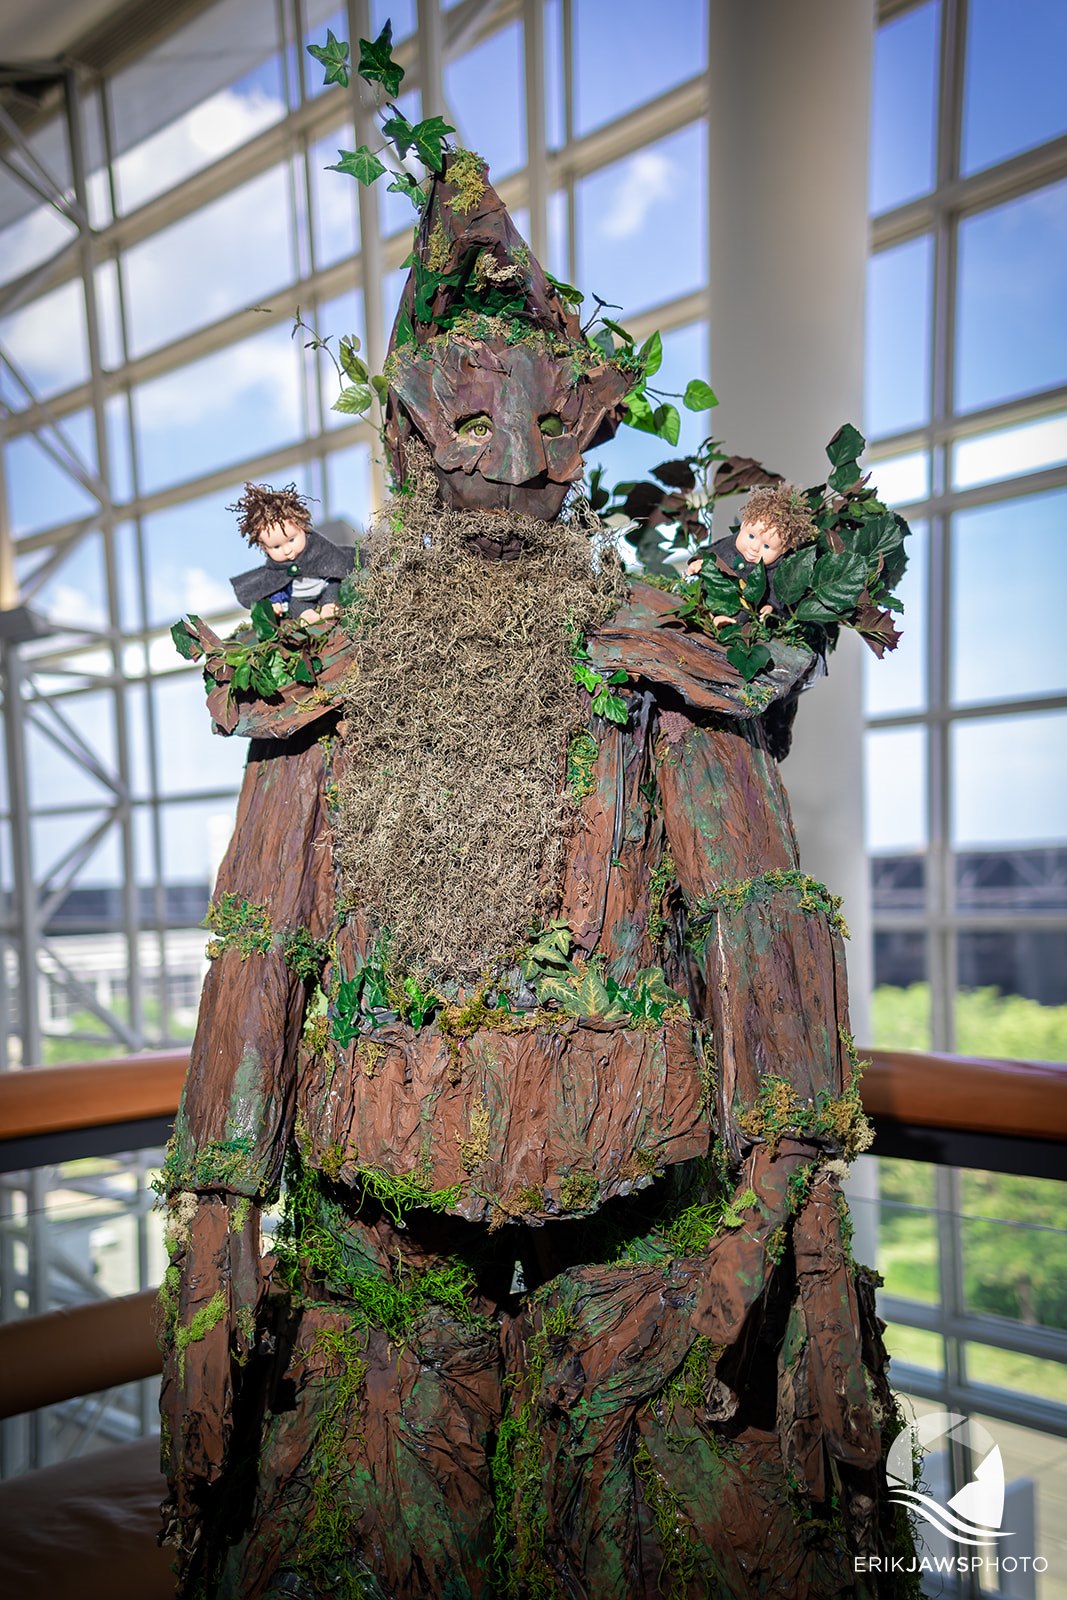
Treebead- C2E2 2022 - Photo by ErikJaws Photo
The Entwife- HH Americas 2025